home & garden : bar cart styling (under construction)

I recently acquired this super-awesome vintage industrial bar cart from Rachel (who is making way for high chairs!). I’m pretty stoked about this buddy & have been collecting inspiration for how to style it.

Some of my favorite bloggers with their gorgeous bar setups:

Love the feminine details on this sweet bar cart from Camille Styles

Bri

Designlovefest’s bar cart is bright & fun!

While not a bar cart, Coco + Kelley’s vibrant table hack is genius & so cute, too!

I’m just getting started playing around with mine — hence (under construction) in this post’s title! — but I’m already having lots of fun! I busted out my silver tea server (collected from various thrift stores) to get in the holiday entertaining mood.

bar cart

I’m excited about filling up the cart with our cocktail gear, recipe books, stripey straws maybe some fruit or flowers.

xo, S.

home & garden : newlywed nest (part 2)

I’m excited to share the rest of my newlywed nest with you today – just like part 1, part 2 is a work in progress!

DSCN0852

Here is our little dining area, right off the living room. The biggest drawback of our place is the TEENY-TINY kitchen, so we’ve gotten pretty creative about storing our most beautiful things on open shelving units.

DSCN0883

DSCN0869

DSCN0865

I just love that kitchen cart! Putting boards on top of our storage units has given us tons more workspace – for two passionate cooks, that was a must!

Besides the awful wood paneling, the kitchen cabinets were my second least favorite thing. We got a firm “no” about painting them white, so we decided to take the doors off to create a lighter look.

DSCN0899

DSCN0901

DSCN0907

Roland wanted to be able to easily access all his beverage equipment, including his lovely collection of glassware!

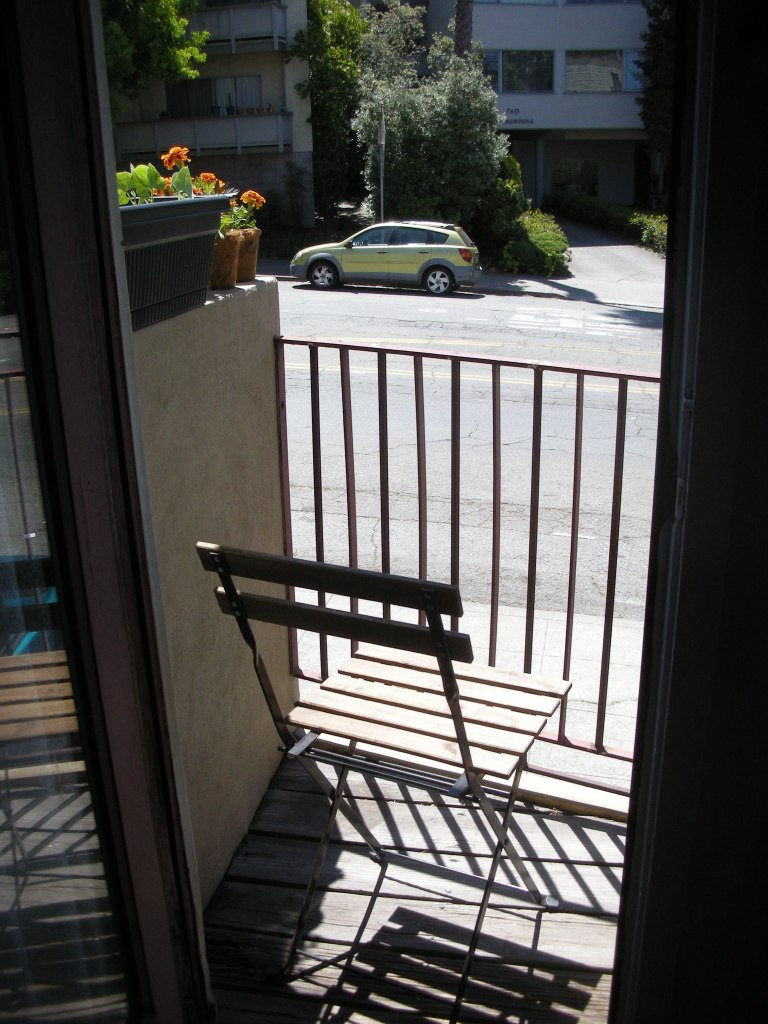
Luckily, the tiny kitchen opens onto a tiny balcony – I love keeping the door open, so the space feels so much bigger!

DSCN0918

DSCN0923

And onto the bedroom…

DSCN0982

DSCN0986

DSCN0963

Recognize these diagrams? We used them in our wedding!

DSCN0970

DSCN0972

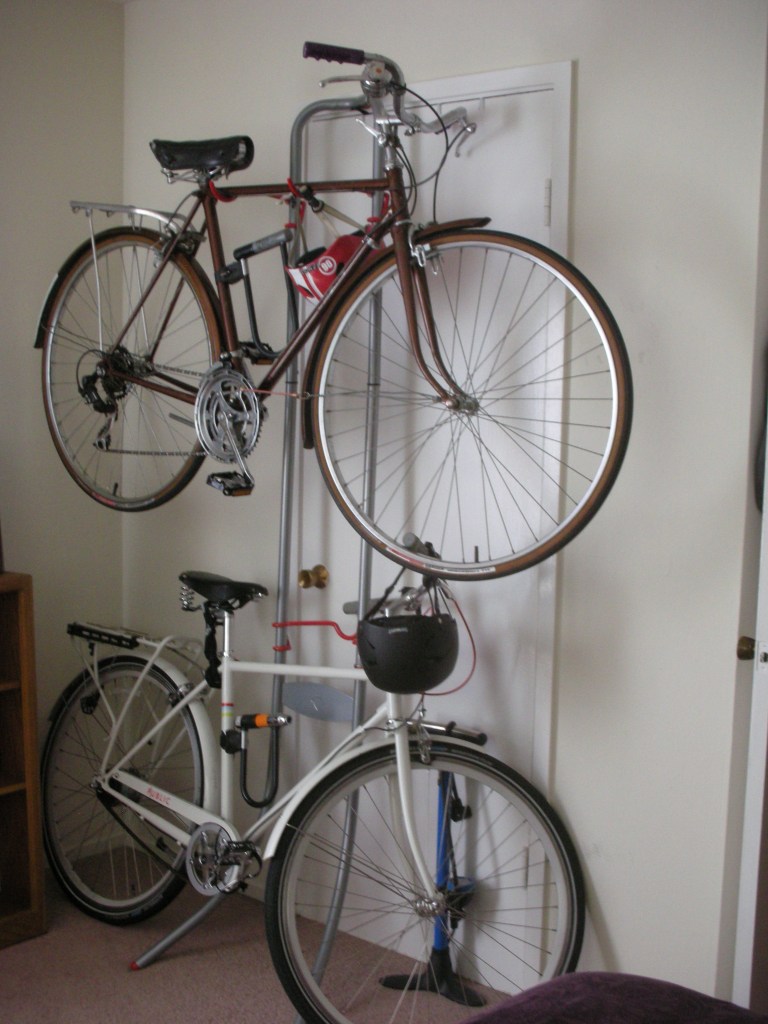
We absolutely love our gravity bike stand from Public – keeping our precious bikes safe & sound indoors was really important to us.

DSCN0977

DSCN0958

There’s that awful paneling again! If we end up staying for a while, I have some ideas up my sleeve for dealing with it, but for now, our oceanography map must suffice!

Okay, my third least favorite thing about our place was the gnarly wrought-iron bars over the window (thank you, Oakland!). While we definitely couldn’t remove them, I used sheers to soften them up & put some pothos cuttings in glass jars on the sill.

DSCN0989

That’s all, folks! Thanks for bearing with this work-in-progress – excited to share updates with you as we work on our newlywed nest!

xo, S.

Ps, Where I Got My Furnishings:

  • kitchen chairs – IKEA, in-laws, dumpster (seriously!)
  • kitchen table & cart – street scores
  • tall kitchen storage unit – yard sale
  • bistro chair – IKEA
  • dresser – hand-me-down from family friend
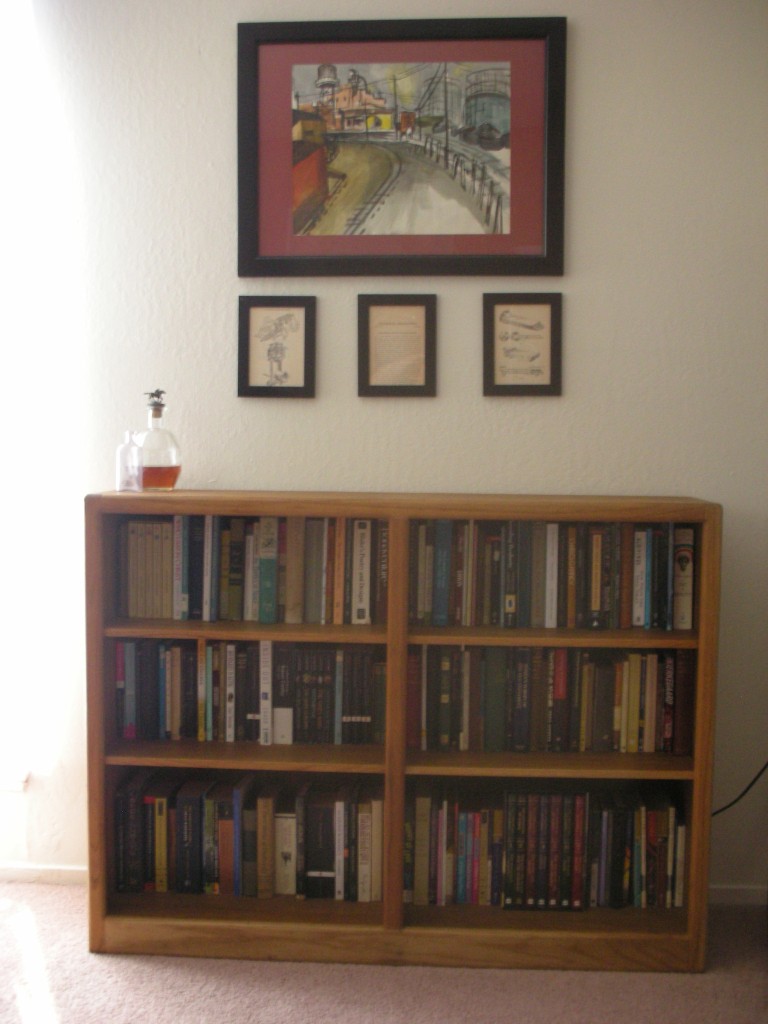
  • bookshelf – hand-me-down from parents
  • bike stand – Public
  • bed frame – hand-me-down from sister
  • lamp & nightstand – IKEA
  • sheers – JC Penney Home

home & garden : newlywed nest (part 1)

DSCN0705

I’m so excited to share some photos of my in-process apartment! I debated waiting until it was ‘more finished’, but that’s the point, right? A home is a continual work in progress!

Roland and I are very lucky to live in a sweet (ie, 650 SF) apartment near Piedmont Avenue in Oakland. We sacrificed space for safety (and killer bars & restaurants!), and we love it!

DSCN0710

DSCN0836

DSCN0727

DSCN0814

DSCN0754

DSCN0762

I’m really happy with how our living space has proceeded. It seemed crazy to have the desk in the living room at first, but we couldn’t fit it through the bedroom door, so I just worked to make it coordinate with the other furniture.

DSCN0825

DSCN0733

DSCN0734

DSCN0827

DSCN0826

Eek, that brown thing. I almost didn’t post this, because it’s SO ugly. We were going to trash it, but then it fit perfectly. I have great plans of painting it and doing something to cover up the awful wood paneling above it.

Stay tuned for part 2!

xo, S.

Ps, Where I Got My Furnishings:

  • Framed art – by family & friends
  • Vintage loveseat & side table – grandma
  • Cocktail glass cabinet – handmade by friend (Studio Black)
  • Yellow lamp – friend
  • Record player – Crosley
  • Other lamps & white bookshelf – IKEA
  • Coffee table & coat rack – in-laws
  • Green pedestal bowl – antique store
  • Globe – aunt
  • Typewriter – Amazon
  • Roll-top desk – Out of the Closet
  • Orange desk chair – Thrift Town
  • Burgundy chair – Urban Ore
  • Vintage scale – yard sale
  • Brown storage piece – street score

home & garden : sad couch, happy couch!

The little things can make the biggest difference!  We’ve had this couch in our family room that has needed some love for awhile.  This weekend I decided to change things up and make this sad couch a happy couch!

IMG_7548

IMG_7551

I already had the golden yellow & grey pillow on the left, as well as the purple throw blanket.  The other two pillows I snagged at Target this weekend.  I just love the way our colorful, happy couch looks now!  What a difference!

IMG_7554

NEW image

xo,

R

home & garden : seeing green

This weekend, Rachel and I went to one of our favorite San Leandro spots – Evergreen Nursery!

Seriously, they have such a great selection of seeds, veggies, flowers, trees – whatever you need! and the staff is so knowledgeable & friendly!

Now that I’m in a gardenless apartment, I’m venturing into the arena of houseplants. The staff helped me pick out some plants that thrive with medium light (which is what we get).

(this lime green pothos plant is my favorite – it makes our apartment more like a jungle!)

I also got some flowers for our teeny-tiny balcony!

xo, S.

nest : diy dotty walls

IMG_6736

Okay . .  so, our bedroom is still a work in progress. I originally thought I wanted to keep the light blue and white walls colours and incorporate some pops of cherry red, but then I found this rug and EVERYTHING changed!

We already had slate grey bedding, so this rug was perfect!  Off to the paint store I went to find the perfect pale grey colour for the walls (yes, repainting again!).  Then, I saw this pin and thought . . this would look so cute with citron-coloured polka dots!

IMG_6674_2

Thus, began my project of DIY dotty walls!  I used a fingerling potato cut in half for the circle (it wasn’t a perfect circle, so if you want it to be precise then use a cookie cutter to cut a shape out of a larger potato, such as russet). I applied the polka dots just on one wall where the head of our bed is because I didn’t want it to feel overwhelming and act as more of a focal point.

IMG_6683

It’s not a perfect method and I did experience some drips, but I kept my eye on them and wiped them with a paper towel (if any drips occur and are allowed to dry, you will need to lightly sand them away before continuing with painting).  When everything was dry, I used a paintbrush to touch up the grey paint.  I wanted the polka dots to have two coats, so I used a Q-tip to fill in any spot that didn’t look quite finished.  This worked very well.

IMG_6700

It was fun last night to look up and see a wall of polka dots behind me, but I still enjoy having the clean walls surround me. I now have three patterns (chevron, polka dots, and stripes) and I’m hoping to incorporate maybe one or two more before I’m finished in this space.

Hope you enjoy!

xo, R.

garden : palette

IMG_6246

This weekend I spent some wonderful time gardening in my front yard.  I filled the bed underneath the kitchen window with all kinds of plants and a wisteria vine that came from my parent’s Victorian farmhouse.  I wanted the flowers to be in the same palette as the lovely purple wisteria, so I chose several lavender bushes, but also accented them with pops of yellow and white.

IMG_6220

Yarrow

IMG_6243

English Dwarf Lavender

IMG_6235

Dusty Miller

IMG_6231

Daisies

IMG_6226

Allysum

I can’t wait until they are mature and fill the bed with their foliage and flowers!

xo, R.

home & garden : staining brick

When we purchased our first home last year, we knew we were buying a house full of potential, much-needed upgrades and DIY-projects . . not a ready-made abode.  We have done a good amount of things to it in the past year, but still have far to go. It’s a process, but the transformation is SO worth it!

One of the biggest eyesores we found living in our house was this fireplace that was added in the 1980′s. Honestly, who thought that a used-brick fireplace was a good idea?

IMG_2975

Anyway, I avoided looking at it for nearly a year, not wanting to paint it white, but not knowing what to do! Once I stumbled upon Anna Moseley’s tutorial on staining brick, I found my answer! Isn’t the transformation amazing?

IMG_5489

I’ve included a link to this tutorial up above, but a few personal notes from me if you’d like to try this yourself :

-I used Behr’s Concrete Stain in the color Loden, available at Home Depot

-Anna’s tutorial recommends using a roller, but for me this was much too messy . . the stain is a VERY thin liquid and it was just too difficult for me to not make a giant mess this way and completely ruin my grout.  I simply used a paintbrush the same width as the bricks and hand-stained each one.  A little bit more tedious and time-consuming? Yes. But definitely worth it!

-My fireplace was in pretty bad shape, but I did it over the course of three days and it took about three coats total! Voila!

(PS. I plan on replacing the old fireplace insert with a modern fireplace cover and staggering some white shelves at varying heights on the fireplace as opposed to the typical mantel. More photos later!)

xo, R.

home & garden : door story

We have a skinny closet in our living room right by our front door that houses our coats, shoes, and a bunch of games like Scrabble, Lie Detector, Monopoly, & Jenga.  Since we go in & out of here several times a day to get shoes out & put shoes away, I thought it might be fun to do something special to this door.

Awhile back I purchased this “book” called Stencil 101 Decor and have been waiting to find the perfect space to stencil.  So.. you guessed it – I stenciled the door!  It turned out great and is an easy DIY for anyone to do.

IMG_5105

I used a “quatrefoil” style stencil and an alphabet letter as an accent.  Also, I did not want the door to be a focal point, but rather a special detail, so the paint I used was the same flat paint I used on the surrounding walls.  It’s best to use something like a foam brush (I used a make-up sponge) and to do several coats, as opposed to one thick coat.  Check it out!

xo, R.